Most quotation discussions focus on graphic overlay, dome feel, and adhesive. The tail and connector get half a sentence. Then the production batch comes back with broken traces near the housing edge, intermittent keys after a few hundred actuations, or connectors that simply do not mate. In our experience the tail is where membrane switch projects quietly fail. This note collects the questions worth asking before drawings are frozen.
Tail Exit Direction Comes From the Housing, Not the Artwork
Designers sometimes place the tail at the most convenient spot on the artwork file. The housing decides where the tail can actually exit. Before you fix the exit position, check three things:
- Where does the cable run inside the enclosure? A tail exiting away from the cable channel forces a 180 degree fold that fatigues the silver paste over time.
- Is there a screw boss, rib, or PCB edge within 5 mm of the planned exit point? Even a small obstruction can pinch the tail during assembly.
- Will the housing be opened later for service? If yes, leave enough slack for the cover to lift without unplugging the membrane switch.
A short walk through the assembly sequence with a sample housing usually answers all three. It is much cheaper than re-tooling the artwork.
Tail Length: Add Service Loop, Not Just the Distance
The tail should not be the exact straight-line distance from the keypad to the PCB connector. Add a service loop of 15 to 25 mm so the operator can route the tail without pulling tension on the membrane edge.
Things that quietly eat your tail length:
- Strain relief glue under the tail exit takes 2 to 3 mm.
- A 90 degree fold around a sheet metal edge needs 4 to 6 mm of bend radius.
- ZIF connectors expect 5 mm of straight tail before the contact area; otherwise the contacts ride on a curve.
If the tail is 60 mm in the drawing and the housing route is 58 mm, the assembler will pull the membrane switch flat against the housing edge to make it reach. That is the start of edge lifting and silver crack lines you see two weeks later.
Tail Reinforcement: When Plain PET Is Not Enough
A bare PET tail handles light service well. It struggles in three cases:
- The tail crosses a sharp sheet metal edge during cable routing.
- The tail is pulled during connector mating because the operator cannot see the housing inside.
- The product is shipped without a connector and the customer plugs it later.
For those cases, ask for a stiffener: usually a 0.2 to 0.5 mm PET or FR4 piece bonded to the back of the tail under the contact area. The stiffener gives the connector something solid to clamp on and protects the silver traces above it.
Do not assume reinforcement is included. Specify thickness, material, and the exact area on the drawing.
Connector Choice: ZIF, LIF, Header, or Solder Pad
Four common interfaces and where each fits:
- ZIF (zero insertion force) FFC connectors. Clean to assemble, low force, good for repeated service. Needs tight tail tolerance (usually +/- 0.1 mm on width) and the stiffener mentioned above.
- LIF (low insertion force) connectors. Slightly cheaper, more tolerant of tail thickness variation, but a small risk of tail slip if vibration is high.
- Pin header with female socket on the PCB. Used when the tail terminates in a separate FPC pigtail with crimped contacts. Very robust, more expensive, and requires extra assembly steps.
- Solder pads on the tail end, hand-soldered to the PCB. Cheapest, no connector cost, but service replacement means desoldering. Acceptable for sealed industrial equipment that is rarely opened.
The rule of thumb: if your PCB designer chose the connector before talking to the membrane switch supplier, double check the tail pitch and pin count match. ZIF pitch is usually 1.0 mm or 0.5 mm, and a mismatch is silent in CAD but obvious in production.
Pin Count and Pinout Direction
Two small details that cause big rework:
- Pin count on the tail must include any ground pins, shield pins, or backlight pins. It is easy to count only the matrix lines and forget the LED return.
- Pinout direction (contacts up or contacts down) must be marked on the drawing. ZIF connectors come in both orientations and a flipped pinout will short rows to columns.
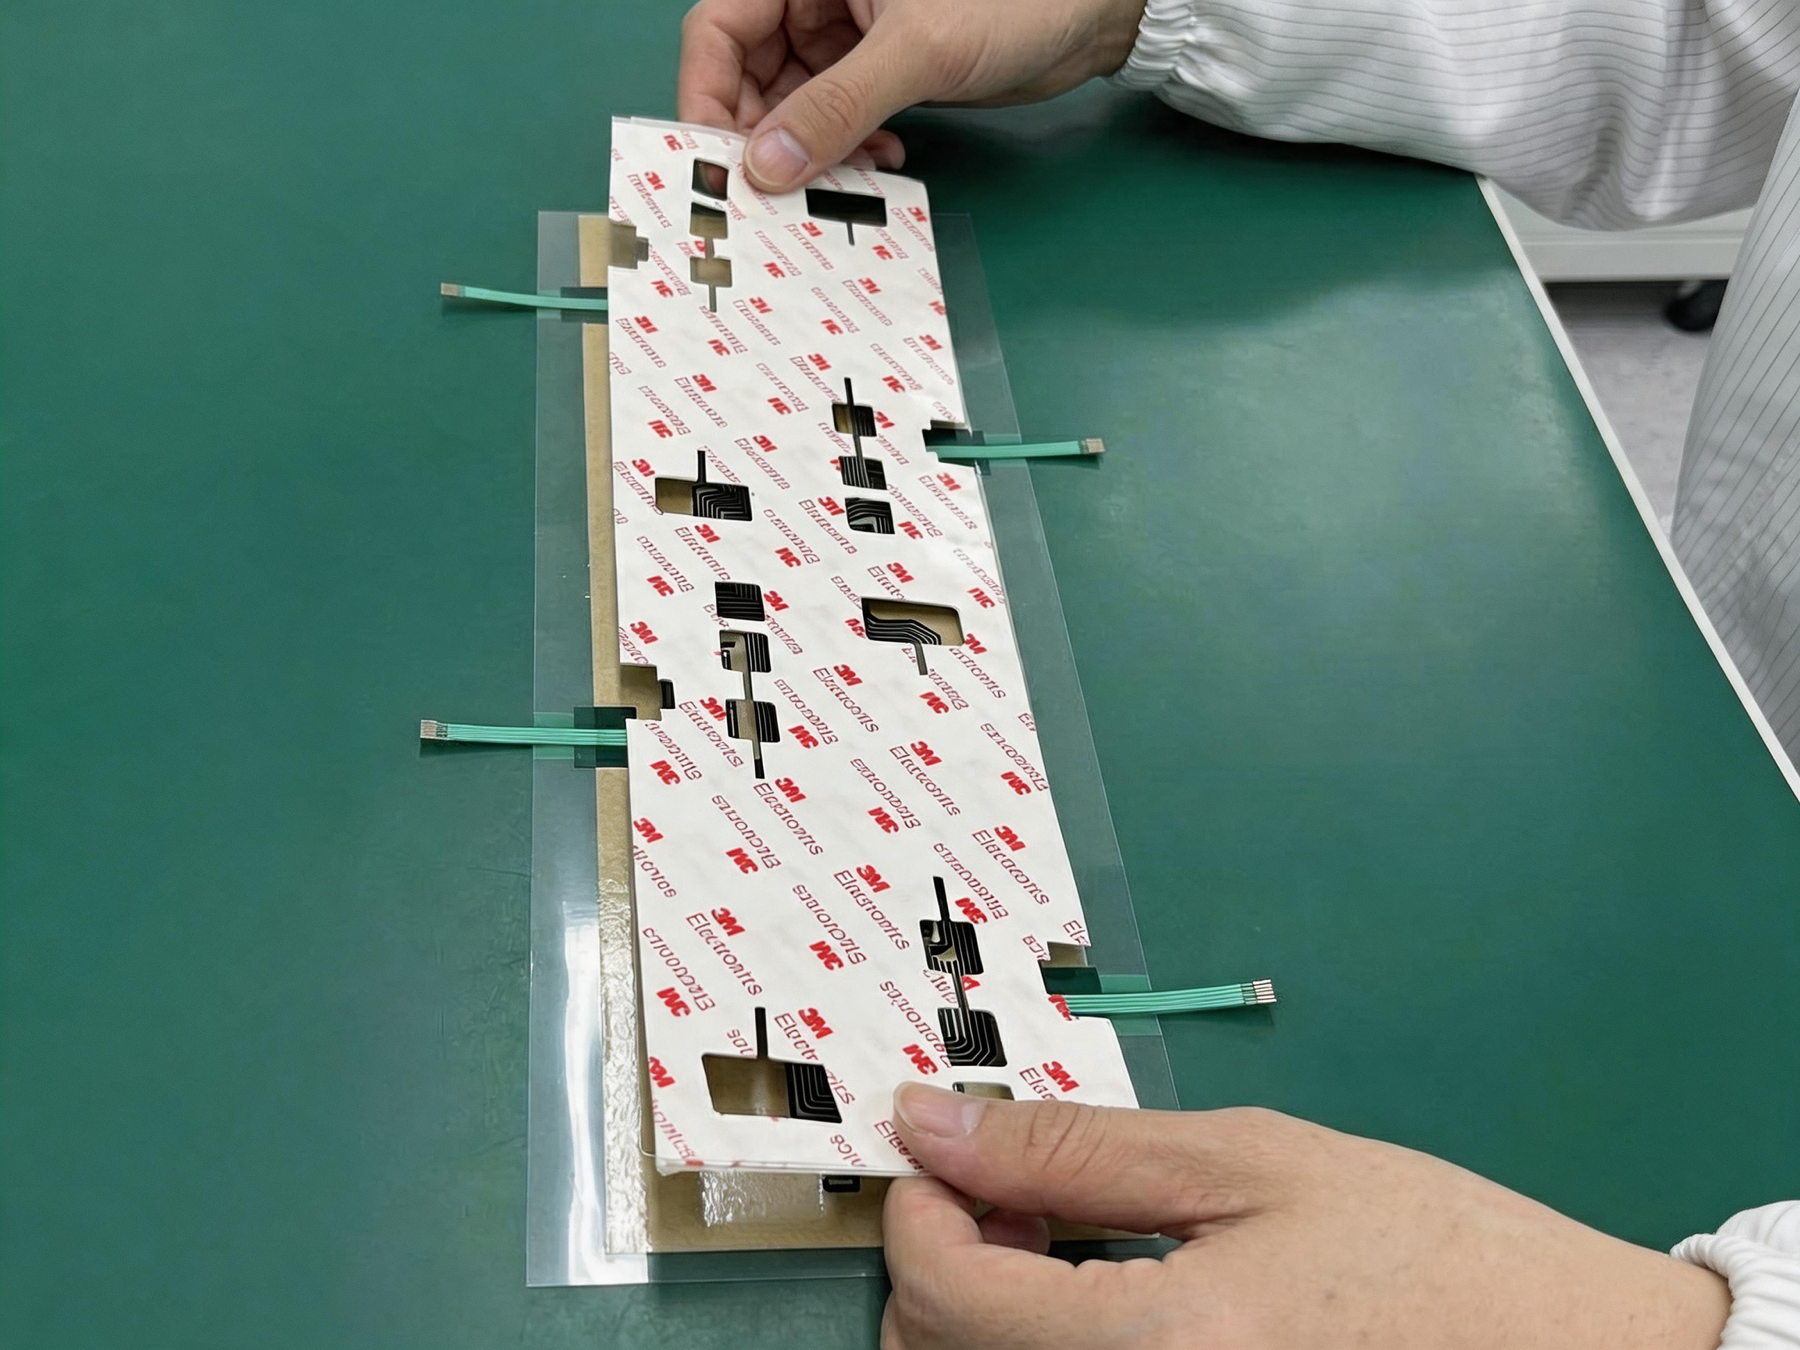
Ask the supplier for a photo of the tail end before mass production. A 30-second visual check beats a returned batch.
What to Send the Supplier Before Quotation
For a usable quotation on the tail and connector side, send:
- A drawing or sketch with tail exit position dimensioned from a clear datum (not just floating on the keypad).
- Total tail length including service loop.
- Tail width and pin count, with pin function labeled.
- Connector part number on the PCB side, or at least pitch and orientation.
- Whether a stiffener is required, and where.
- Whether the tail will be folded during assembly, and the fold direction.
Most of this fits on one A4 sheet. A supplier who gets this information up front can quote accurately and will not surprise you with change orders later.
Closing Note
The tail is rarely the part that wins a project. It is often the part that loses one. Spending an extra hour on the questions above saves weeks of rework. If you want a second pair of eyes on a tail design before you freeze it, share the drawing and the housing photo. We are happy to point out the routing problems we have seen in similar builds.
Need help reviewing a structure?
Send your drawing, photos, application, and quantity. Baoshengda can help check the structure before sampling.
Send Drawing for Quote